I’m always on the look out for simple (read easy) recipes that are delicious. Of course for me there are also other deciding factors in whether or not I’ll try a recipe…for one I really really prefer to cook from scratch and 2 I really really don’t like a lot of ingredients, it’s too darn expensive when there’s a lot of ingredients. As part of my economizing this month I’ve decided to try a new approach…focusing on one cuisine in a shopping period. This week is Italian. So I broke out my wiliams sonoma italian essentials cook book and found Pork loin braised in milk. Pretty darn good, if I do say so myself. Here is my adaptation (read non measured thrown together version) of this unkown (in america) classic.
August 3, 2010
June 11, 2019
Full-Time RV Long Range WiFi & Internet Setup
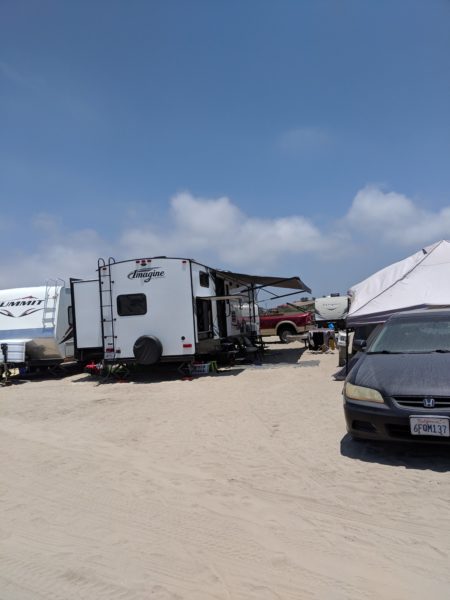
When we wanted to get all of our connected devices on a personal network and use the WiFi provided at campsites as our internet service it took some serious research and decisions followed by several hours of tinkering.
We settled on Ubiquiti equipment as it offers great range at a very modest price. For an access point to get a connected to the camp host we went with the Ubiquiti Nanostation M2 (NSM2), it offers incredibly long range with a very stable connection. For our personal network to connect TV’s, laptops, tablets, phones, and game consoles we went with the Ubiquiti AirGateway LR (now discontinued and we recommend the Ubiquiti AirCube AC).


The AirGateway and AirCube are very simple to get setup for an inside personal network, the Nanostation however required a bit of modification to get working at all the places we have stopped. Wireless ISP’s are notorious for making it difficult to connect streaming devices and the worst offender we have run into is the Navy MWR goWifi by Viasat. These guys use MikroTik equipment and modify the return Time to Live (TTL) to 1 so that packets get dropped at the first device they hit.
Ubiquiti equipment runs on a very slim Linux platform that was modified from OpenWRT. When they first started out it was relatively easy to modify the software, these days as a more serious company they have been forced to harden the hardware and software to make it more difficult for hackers to cause mayhem. While the standard AirOS will work at the very large majority of places we stay, it was the goWifi that got us to work through getting OpenWRT installed on our Nanostation so we could fix the TTL problem they were causing. The following walk-through is more for our reference later on down the road, but may come in handy for you if found in a situation wanting a recent version of OpenWRT on your XW Nanostation.
Step 1
Downgrade your Nanostation firmware to XW.v5.6.15.30572.170328.1052 (unsigned)
Step 2
Install the XW port of OpenWRT, even though it references the M5 this is what you need to load on an XW M2 as well.
Step 3
In order to match and change IP packet options you’ll need some additional packages which are easily installed from System->Software:
Install the iptables-mod-ipopt package and required dependencies
Step 4
Modify the firewall custom rules:
iptables -t mangle -A PREROUTING -j TTL –ttl-inc 3
iptables -t nat -A PREROUTING -j TTL –ttl-inc 3
Step 5
To get away from WebTitan Cloud restrictions on websites you are allowed to visit we can modify the DNS provider, again Viasat is getting in the way catching all DNS queries on port 53 and sending them to their designated DNS provider, instead we can use OpenDNS on an alternate port.
Under Network->DHCP and DNS->DNS forwardings enter:
208.67.222.222#5353
208.67.220.220#5353
What’s your setup look like? Let us know in the comments below!
September 27, 2018
Race to 10
It’s that time of year again…The first month of school. Which means going back over what we learned last year, to make sure we mastered all of our topics.
Turns out my poor first grader did not get as from the foundation as her siblings did so we are going back over a lesson that really helped her older siblings.
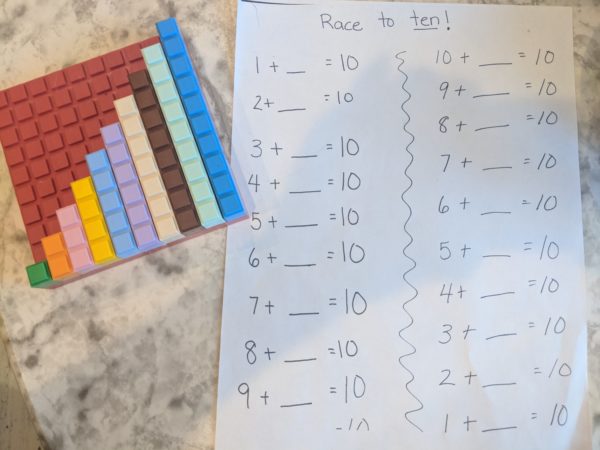
We call it race to 10. First they learn everybody’s partner in the race to 10. Then every time we’re in the car, wr play race to 10. I tell them I have a 2 (or any number 1-9) and I need 10 and they race to tell me the answer. Oh the joys of homeschooling… You don’t even get a break when you’re driving to the grocery store.
Click here to download the race to 10 worksheet
This is something I created to enhance our beloved Math-U-see curriculum.
Even if you aren’t using math you see, consider purchasing a set of math manipulative blocks, they are super helpful with helping children grasp math concepts. You can find different base 10 blocks on amazon, but I greatly prefer the Math-U-See version. In addition to blocks for 100, 10 & 1. This set has blocks for all numbers 1-10, & 100. It is occasionally found on amazon, but can be ordered directly from Math-U-See’s website
*I do use affiliate links to help offset our RV purchases, if you like what you see, considering purchasing your Amazon items through my links, thank you.
September 25, 2018
A big move…
I’ve put off blogging, for forever. We moved, and moved again, and well… Life got in the way.
I’ll give you the quick version. I lost my Jamberry business (still miffed), there was a wedding I was hugely involved in, a car accident, the baby got pneumonia, made a “best friend” connection, lost said best friend, bought 24 chickens & 3 goats…2 goats had tripplets ( in the same month), bought an RV to stay near a with a sick family member, said family member lost their battle with cancer, on the same day my grams broke her hip…got transferred to socal, sold almost all our possessions, bought a monster of a truck, moved into the RV full time, went on some Adventures, sold my mom-mobile, went keto, lost 20 pounds and now I’m trying to get back on track. As I said LIFE…full of ups and downs.
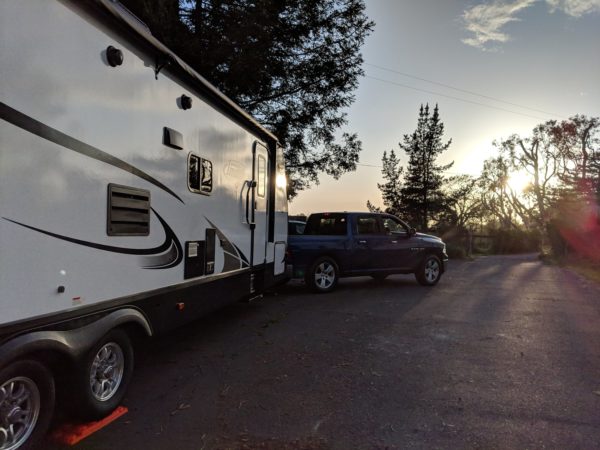
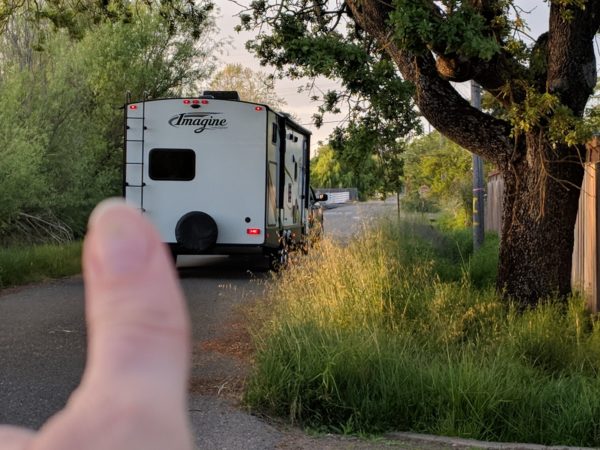
So you’re all caught up. We were relocated to San Diego in June, and we decided it was time to make our dreams of living on a sailboat come true. BUT, we had all the debt from the RV and new truck… So we moved into the RV to practice small living while saving up for our dream boat.
Selling everything we owned except for our family heirlooms and pictures was the most freeing and stressful experience of my life. It’s hard to let go of things you have collected for 15 years. But, we did it and we’ve now been full-time living in an RV (while homeschooling) for 6 months now. It’s been surprisingly not awful.
We’ve learned a lot. So that’s what a lot of my posts will be about in the coming months (plus some obligatory food posts). Things we found that helped us, mistakes we’ve made, I’ll give you a tour of the RV (when I cleaned up)… Basically I’ll introduce you to our RV home, in #MamasTrailer


July 25, 2014
Heat rash relief and perfume.

For most of my life I’ve struggled with my weight. In highschool and my early twenties I did all the fad “diets,” I still shudder when I think of cabbage soup…I developed a thyroid condition, suffered from chronic pain, heart palpitations, nausea, and poor vision…plus my weight kept going up. I was doing everything my doctors, the media and my mom told me to but I kept gaining weight. Fast forward a decade and you have a very overweight 30 year old housewife. I’m not going to write about wright loss today, although you should read nourishing traditions if you are struggling with health and weight issues. Today I’m going to talk about one of the irritating side effects of being fat…heat rashes.
When you are fat (or have big breasts) skin touching/flapping/rubbing against skin can lead to irritation and heat rashes. Its maddening. At times it can get almost as bad poison oak *shudder.*
My poor husband can attest to the fact that I have been suffering horribly from heat rashes for the past several months. I made a special blend of essential oils to help, but it only helped a little. I had mixed the oils with a carrier oil…which is not ideal for heat rashes. Last night I had a TADA moment. Why not make a spray. But how was I to mix oils with water??? As usual Mr. Google provided an answer. Alcohol! This spray is marvelous. It cools and soothes the heat rash instantly, and it dries super fast so there is no moisture issues. As a plus it smells so good that I’ll be using it as a perfume AND a linen/room spray. Talk about multi purpose.
As a heavy woman this is a necessity for me, but it will obviously work for men, skinny women and teenagers who suffer from heat rash. Also please note, I’m not a healthcare professional, this is just how I personally treat heat rash and you should use your own judgment when taking advice from somebody on the internet.
Lavedermint spritz:
1 clean/empty bottle with spray nozzle (I salvaged an old body spray bottle)
1tbsp vodka
15 drops lavender essential oil
10 drops peppermint essential oil
8 drops eucalyptus essential oil
Filtered or distilled water 1 cup
Mix oils and vodka, fill with water shake. Done.
Shake before each use.
Its that easy. You can adjust to make it weaker or stronger. I wouldn’t use this on children under 2 or on anything that would come into direct contact with their skin. If you want something for children use lavender only. Eucalyptus and mint may cause respiratory issues in infants.
July 9, 2014
A-Z=cornbread!
My grandma’s A-Z bread has always been my favorite baking recipe. Period. It makes THE best banana nut bread ever. THE best zucchini bread…the best carrot raisin bread…the best apple bread. You get the picture. One day I ran out of baking soda, and after a suggestion from Mr. Google I substituted extra baking powder and suddenly I had the best muffin recipe too!!!
I’ve been searching for a good from scratch corn bread recipe, for some time now. It, finally, dawned on me to try grams’ A-Z bread…BINGO!!!! I altered it a bit, but it was a good starting point.
1.5 cups unbleached AP flour
1.5 cups corn “flour” (I ground corn meal until super fine)
1 tsp. salt
1 1/2 tbsp baking powder
3 eggs
1 cup melted butter (or vegetable oil)
1 cup of sugar
1 cup of honey
1 applesauce snack cup (or 1\2 cup)
1 cup of sweet corn blended
1\2 cup sweet corn kernels
Preheat oven to 325 degrees.
Mix all ingredients together. No need to do wet and dry, just start at the top of list and work your way down. Bake in muffin pan, until tooth pick comes out clean.
June 20, 2014
The evolving granola recipe

This my granola recipe, its a very delicious work in progress. Basically granola is oats, moistened, sweetened, with oil and slowly dehydrated or baked. I like the addition of chia and flax for the wonderful health benefits, but they also help hold the granola together due to their gel like substance they make when wet. When this gel dries it acts like a glue.
Ingredients:
Dry-
7 cups tolled oats
1\2 cup hemp hearts
1\2 cup hemp protein powder
1 1\2 cups chia and/or flax
1 cup chipped coconut or 1\2 cup shredded coconut
2 tsp cinnamon
*optional, raisins, craisins, pine nuts, pumpkinseeds, sunflower seeds etc.
Wet-
1\2 cup raw local honey
2 cups warm water
3\4 cup cold pressed coconut oil
2 tsp vanilla
Mix all dry ingredients (fits perfectly in a kitchen aid mixer) until all ingredients are well distributed. Stir all the wet ingredients together (your coconut oil will need to be melted) then slowly pour into the dry ingredients. Line a sheet pan with parchment paper. Dump the granola onto the sheet pan and press/smooth into one thick layer. You can precut bar shapes if that’s what you are using it for. Bake at 175° for 4-6 hours, until dry. A dehydrator would work even better, but alas I don’t have one…yet.

This batch had craisins and pumpkin seeds…..

As you can see its a big hit!
May 4, 2014
Another organization board

Just a quick snapshot of a rainy day craft the kids and I just finished. A board to organize all my yarn art tools. Knitting looms and a bucket for my crochet hooks. Still room if I buy another loom or something 🙂
May 3, 2014
Easy window cleaning (really!)
Sometimes I realize I spend all together too much time alone with myself and 3 small children. Today I found myself cackling to myself when I realized I could clean my big old windows without a ladder and without moving my couch (which would add a few minutes as I’d have to clean under the sofa as well…). All I had to do was use my swifter…duh. Forgive me if I’m late to the game with this idea, but for me its a game changer!

And of course this is a great way to get your window clean with little effort

April 20, 2014
White wine cake
Normally I’m all about cooking from scratch…BUT, I’m scared of baking.
I’ve been slowly learning how to bake bread, and I can make pasta (does that count?) but whenever I try and make a cake from scratch it…sucks. So for Easter, I decided to use a cake mix that was in my pantry…I’ll try not to buy any more, once they’re gone. BUT, it was there and I was feeling lazy. As I was pulling stuff out I realized, that I didn’t want to make JUST a yellow cake, from a box. So I started to think about what I could do to mess with the cake mix. I subbed white wine, a rhine, for the water, and added half a box of pudding mix, ’cause it was there too. 😀 I made the mix like normal, except I withheld the egg whites. When the batter was done, I swapped bowls and beaters in my stand mixer, and I whipped the egg whites to stiff peaks. Then folded them in. What I got was a spongy lightly wine flavored cake. IT TASTES AWESOME! Now if only I could bake a cake this delicious from scratch.
April 19, 2014
Homemade chocolate syrup

Weeding out all the toxic items from our diet, like high fructose corn syrup and hydrogenated oils, can be daunting and frustrating. One of the easiest (and cheapest!) ways to do this, is to make your own food.
Chocolate milk, is a treat I denied my children after reading the ingredients on the back of the chocolate syrup bottle. And, they begged and pleaded frequently for it. Luckily for me I found this recipe after only a few months into our chocolate syrup ban. It is EASY to make, tastes JUST like the real thing, and its cheap to make. I reuse an old chocolate syrup bottle…and my husband doesn’t even suspect.
original recipe by goodthingbyjillee.com
Homemade chocolate syrup
1 1/2 cups organic evaporated cane sugar
3/4 cup cocoa powder
1 cup water
Pinch of REAL salt
1 teaspoon vanilla
Whisk together sugar, cocoa, and salt in a small pot. Slowly, stir in water and bring to a boil. Stir occasionally. Reduce heat and simmer for 2 minutes. Remove from heat and add vanilla. Store in the refrigerator.


Doesn’t it look like the real thing?