I can’t believe how quickly time flies. One day I was struggling to figure out how to get my newborn to stop crying for one minute and the next I was planning her 1st birthday. And now, it’s almost 2 months later and I realized I never put up pictures. For shame. I had so much fun planning her party. As far as themes go I didn’t really push the envelope or get very creative. I just knew that I was going to throw her a cowgirl party. We were going to be in the hick town of my childhood to celebrate so it seemed appropriate…and fun. My inspiration and my main goal revolved around the cake. Yes of course…FOOD.
Here’s the inspiration photos:
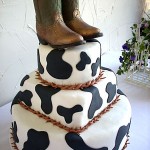
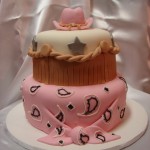
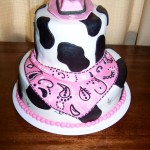
And here’s the cake the I barely managed to finish in time:
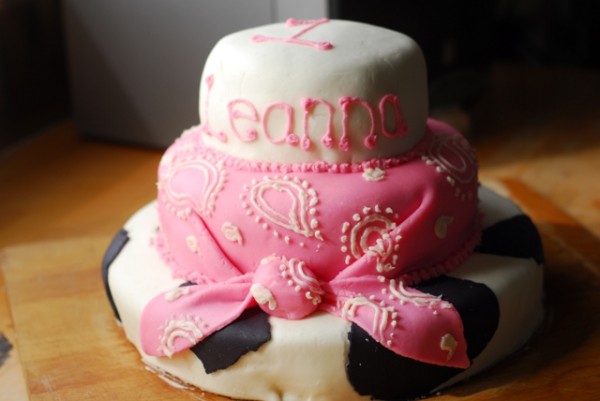
This cake was time consuming but fairly easy to make…I’ll admit it I used a box mix. No shame in it as it turned out great. It took approximately 3 pillsbury vanilla cake mixes and 1 chocolate. I didn’t do anything fancy just followed the directions on the back of the box. However, I did make my own butter cream frosting, marshmallow fondant, lemon filling and cinnamon chocolate fillings…easy as pie…I mean cake.
Here’s the website that taught be how to make the best marshmallow fondant
I used wilton’s butter cream frosting recipe x like 4
I made a
2 layer, vanilla 12 inch cake
2 layer, chocale 9 inch cake
2 layer, vanilla 6 inch cake
For the filling between the vanilla layers I mixed 1 1/2 jars of trader Joe’s lemon curd with 1 batch of buttercream frosting. I spread the remaining lemon curd directly on the cake before adding the filling to add some moisture (great results) Make sure that when you spread your fillings on your base cake to leave a 3/4 to 1 inch ring around the outside of the cake, then with a pastry bag with only the coupler (no tip) pipe a line of white butter cream around the rim. This will keep your slightly yellow or chocolate colored filling from squeezing through and possibly being visible through the fondant…that stuff shows everything.
For the filling between the chocolate layers I mixed 1/2 batch of buttercream frosting with 2 tbsp cocoa powder and 1 teaspoon of cinnamon (these numbers are guesstimates…I just added the two to my buttercream until I was happy with the flavor) assemble your cakes…frost with buttercream. Then roll out your fondant (which can be made up to a week in advance) For the cow print (work quickly, and have the black fondant pre dyed) roll out enough white fondant to cover the tier you’re working on. Very quicly roll out the black fondant and cut or tear pieces that look like irregular cow spots. Dab a tiny bit of water on the back of the black and lay it on the white fondant. when all your black pieces are assembled to your satisfaction roll the fondant with your rolling pin to merge the two colors together for a seamless cowprint…easy. Gently slide your hands under the fondant and drape over your cake. Very VERY VERY gently Smooth it over the cake. If there are any wrinkles just smooth them out like a sheet on a bed…again very gently as too much preasure will leave behind marks and your fingernails can easily scratch and even tear the fondant. For the “bandana” roll out the pink fondant, smooth the top like before, but when smoothing out the sides start at the “back of the cake and gently smooth the fondant while pulling the excess towards the “front” of the cake. When you reach the front 1/3 of the cake create two folds that meet and smooth. Trim the excess and use the remaining pink fondant to cut out two leaf shapes and roll out a 1- 1 1/2 inch ball. Create a “fold” in the wide ends of the leaf shapes and lay them creased sides touching in front of the folds and place the ball on top of where they meat…and you have a knotted bandanna. To create the paisley print I piped on white butter cream. I ran out of time for the third tier, so I just piped on some pink buttercream frosting, but I’m rather glad that I had to stop or the cake might have been too busy. Some notes…when making a cake that’s this many layers you really should use cake dowels…luckily the cake was assembled only hours before being consumed otherwise it would have been listing terribly…note to self, don’t trust husband to bring the important things…remember to pack them yourself. All in all my first fondant experience was positive. The cowprint would have turned out better if I had the black fondant ready to go when I needed it as it was the two were a little dry and didn’t look as polished as could be. I also would have assemebled the cake the night before. I was concerned about the moisture level…and what would happen with everything encased in fondant. It would have been fine. The top of the cake didn’t get eaten at the party and it was a couple of days before it was cut into…it was still moist and delicious.
Now the rest of the party:
the menu: (think cook out/picnic food)
shredded beef sandwiches
(super easy…crock pot, pot roast meat in water over night, shredded and mixed with BBQ sauce, served on
hamburger buns)
Hot dogs (costco)
smores sandwiches (for the kiddos, toasted white bread peanut butter and marshmallow cream that got toasted by a
blowtorch)
Baked beans
salad
pineapple
tortilla chips (costco)
nacho cheese dip (costco)
creamy chili dip (1/3 of a bar of cream cheese to each can of chili, heated up and mixed together VERY VERY GOOD)
Salsa (1 jar of trader joe’s fire roasted salsa mixed with 2 jars of their smokey peach salsa)
Someone donated some potato chips and clam dip (yum)
Lemonade with fresh strawberries and sliced lemon floating in it (we cheated and used country time from costco to save money)
bottled water
Root beer
I know this post was a while ago, but I was wondering if you used dowel rods in your cake? Thanks!
Comment by Mrslamb — February 7, 2012 @ 5:41 pm
I did, each tier was 2 layers making the cake 6 layers. Anything over 4, I err on the side of caution, and use dowel rods. I used 2 or 3 running the full height of the cake.
Comment by Mindy M. — February 9, 2012 @ 8:50 pm